
Part 1: Modeling and Product Configuration
Working with the Model and Source Code
In this second step of our tutorial we will expand our model and work with the generated source code.
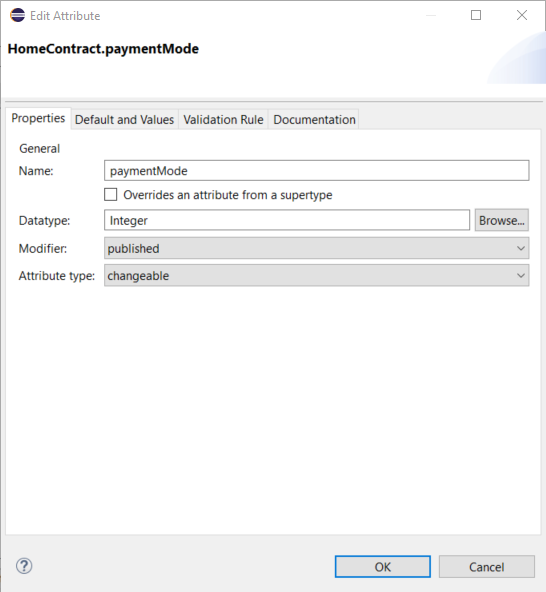
First, we will add an attribute named "paymentMode" to our HomeContract class. If the editor showing the contract class has been closed in the meantime, you can open it by double clicking on the class inside the Model Explorer. Within the editor, click on the New button in the Attributes section to open the following dialog box:
Figure 1. Dialog for Creating a New Attribute
The values have the following meanings:
| Value | Meaning |
|---|---|
Name |
The name of the attribute. |
Override |
Indicates that the attribute has already been defined in a superclass, so that this class just overrides certain properties (e.g. the default value) [5]. |
Datatype |
The datatype of the attribute. |
Modifier |
Similar to a Java modifier. The additional published modifier means that the property is included in the published interface [6]. |
Attribute type |
The type of the attribute. * changeable |
[5] Corresponds to the @Override annotation in Java 5.
[6] Note: The activation/deactivation of the generation of the published interfaces takes place via the context menu ► properties ► Faktor-IPS Code Generator of the corresponding project.
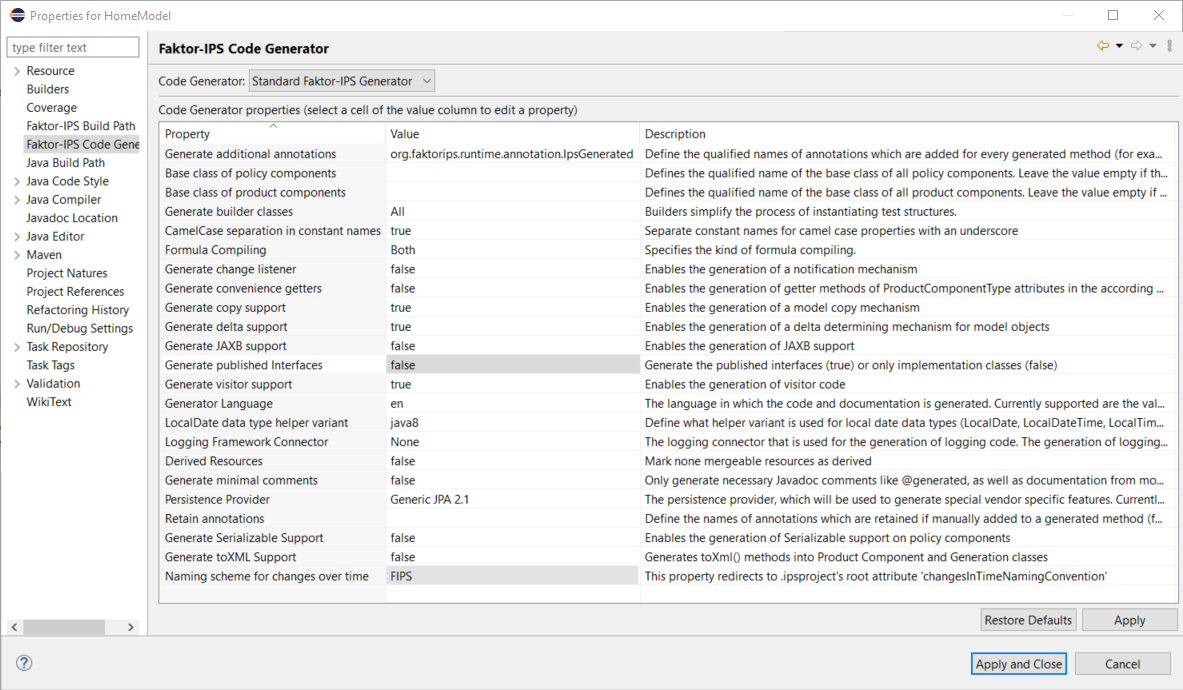
Figure 2. Activation/Deactivation of the generation of the published interfaces
Enter "paymentMode" as the name and Integer as the datatype of the attribute. When you click the Browse button next to the text box, a list of available datatypes will open for you. Alternatively, you can use Ctrl-Space to perform an Eclipse-like auto completion. For example, if you enter "D" and press Ctrl-Space, you will see all datatypes beginning with "D". You can leave the other text boxes at their default values, click OK, and save the contract class.
The code generator has already updated the Java source files. The class HomeContract now includes accessor methods for the attribute and saves the state in a private member variable.
/**
 * Member variable for paymentMode.
 *
 * @generated
 */
private Integer paymentMode = null;

/**
 * Creates a new HomeContract.
 *
 * @generated
 */
@IpsGenerated
public HomeContract() {
    super();
}

/**
 * Returns the paymentMode.
 *
 * @generated
 */
@IpsAttribute(name = "paymentMode", kind = AttributeKind.CHANGEABLE, valueSetKind = ValueSetKind.AllValues)
@IpsGenerated
public Integer getPaymentMode() {
    return paymentMode;
}

/**
 * Sets the value of attribute paymentMode.
 *
 * @generated
 */
@IpsAttributeSetter("paymentMode")
@IpsGenerated
public void setPaymentMode(Integer newValue) {
    this.paymentMode = newValue;
}
The JavaDoc for this member variable and its getter method will be tagged as @generated, meaning that the method is 100% auto generated. With each new adjustment, this code will be created in exactly the same way, even if it has been deleted or modified within the file in the meantime. This means that modifications made by the developer will be overridden. If you want to modify the method, you have to add the word NOT to the @generated annotation.
Let us try this out. Add one line to both the getter method and the setter method and add NOT behind the annotation of the setPaymentMode() method, like this:
/**
 * Returns the paymentMode.
 *
 * @generated
 */
@IpsAttribute(name = "paymentMode", kind = AttributeKind.CHANGEABLE, valueSetKind = ValueSetKind.AllValues)
@IpsGenerated
public Integer getPaymentMode() {
    System.out.println("getPaymentMode");
    return paymentMode;
}

/**
 * Sets the value of attribute paymentMode.
 *
 * @generated NOT
 */
@IpsAttributeSetter("paymentMode")
@IpsGenerated
public void setPaymentMode(Integer newValue) {
    System.out.println("setZahlweise");
    this.paymentMode = newValue;
}
Now re-generate the source code of the HomeContract class. You can do this in two ways:
-
You build the entire project using Project ► Clean, or
-
You save the model description of the
HomeContractclass again.
When the adjustment has been completed, the System.out.println(…) has been removed from the getter method while it is still present in the setter method.
Methods and attributes that have been added are maintained throughout the adjustment process, so you can extend your source code as you wish.
Now we will extend the model definition of the mode of payment by adding the allowed values. To do this, you must open the edit dialog for attributes and go to the second tab page. Up to now, all values of the indicated data type have been accepted as legal attribute values. We will now limit this to the values 1, 2, 4, 12 meaning monthly, quarterly, bi-annually, and annually, respectively. Change the type to Enumeration and enter the values 1, 2, 4, and 12 into the table[7].
[7] In addition, Faktor-IPS supports the definition of Enums, though we will not use this feature here. You can also use an extension point to register any Java classes as data types. These Java classes should be implemented as ValueObject.
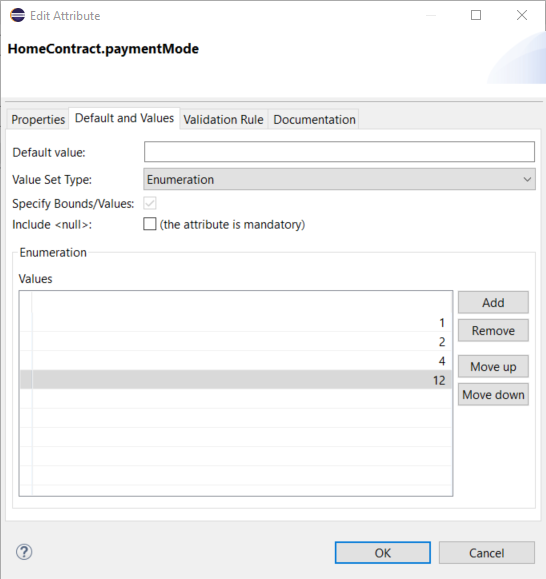
Figure 3. Define Legal Values for an Attribute
Now set the Default Value to 0. Faktor-IPS will mark the Default Value with a warning, because that value is not included in the set of legal values. Consequently, this could indicate an error in the model. We will leave it this way for the time being, because it will give us an opportunity to examine the Faktor-IPS error handling. Close the dialog box and save the contract class. The same warning message as in the dialog now appears within the Eclipse Problems View. Faktor-IPS permits errors and inconsistencies in the model, just informing the user that a problem has been encountered. As in Eclipse, this information is conveyed in the editors and by so called problem markers that appear in the Problem View and in the Explorers.

Figure 4. Error Warnings Inside the Problems View
Now delete the default value again and save the contract class. This way, the warning will be cleared from the Problems View.
Faktor-IPS will generate a warning instead of an error, because in some cases it can make sense to provide a default value that is not included in the range of legal values. This is especially true for a default value of null. For example, if a new contract is created, it might be desirable not to preset a mode of payment and just leave this field at a null default in order to force the user to enter a mode of payment. Only when the contract is eventually completed, the condition that the paymentMode property must contain a value from the legal range of values must be met.
At the end of this chapter we will now define a class named HomeBaseCoverage and determine the composition relationship between HomeContract and HomeBaseCoverage according to the following diagram:
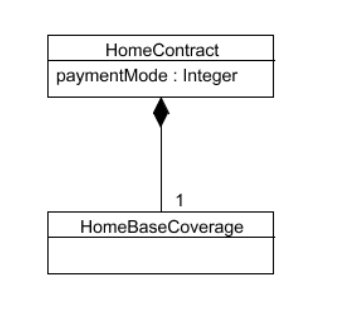
Figure 5. Contract model
First, you have to create the HomeBaseCoverage class in line with the HomeContract class. Then you go back to the HomeContract class and open it in the editor. To start the wizard for creating new relationships, you have to click the New button at the right-hand side next to the Associations section[8].
[8] In accordance with UML, Faktor-IPS uses the term "association". In the text, however, we prefer the term "relationship" that is more common in general language usage.
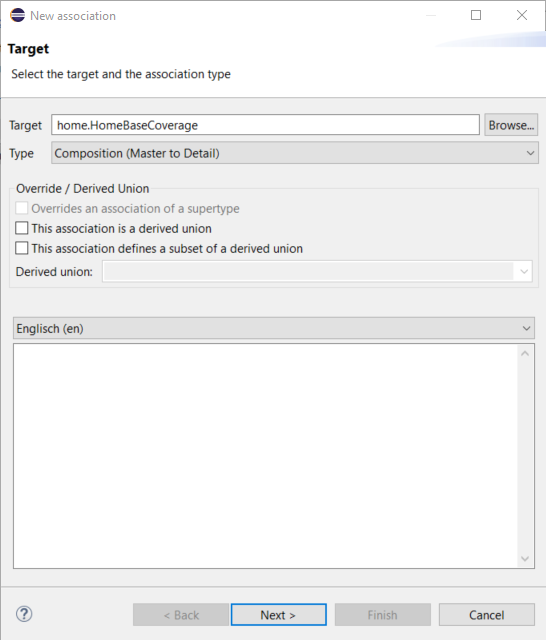
Figure 6. Creating a new Relationship
Your target will be the recently created HomeBaseCoverage class. Again, you can use the auto completion functionality with Ctrl-Space. At this point, please ignore the text box named Derived Union. This concept will be dealt with in the tutorial on model partitioning.
On the following page, enter 1 as both minimum and maximum cardinality and name the singular role HomeBaseCoverage as suggested and leave the plural role empty. The plural is used so that the code generator can create comprehensible source code for associations that allow multiple targets.
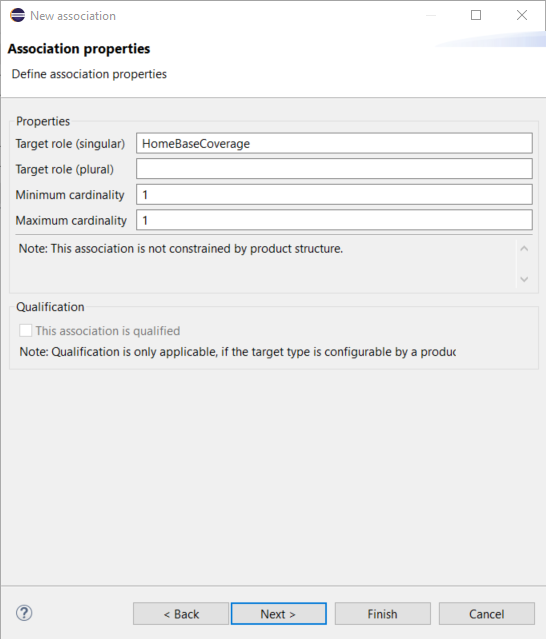
Figure 7. Role Names and Cardinalities in a Relationship
On the next page you can choose whether there is to be a backward relationship between HomeBaseCoverage and HomeContract. Relationships in Faktor-IPS are always directed, so it is possible to allow navigation in only one direction. Choose New inverse association and go to the next page.
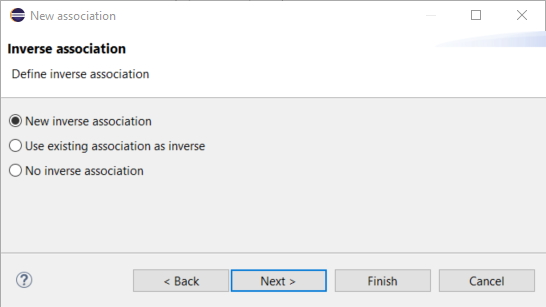
Figure 8. Create new backward relationship
In the next window, enter the role description of the inverse relationship.
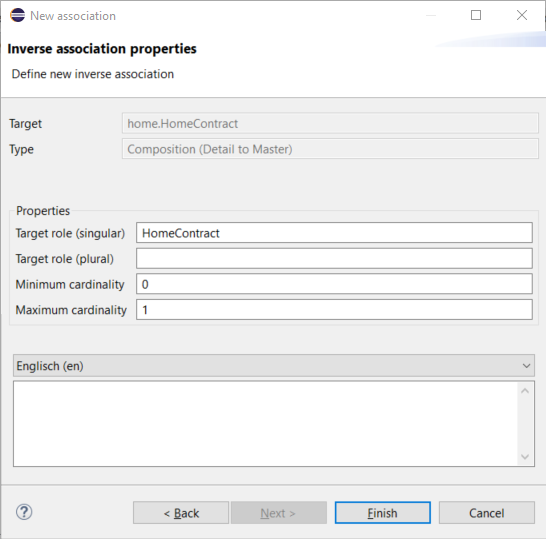
Figure 9. Properties of the backward relationship
Click Finish to establish both relationships (forward and backward), and save the HomeContract class. When you look at the HomeBaseCoverage class you will see that the backward relationship has been added.
Finally, we will take a quick look at the generated source code. Inside the class HomeContract methods have been created to add basic coverage to the HomeContract. Inside the class HomeBaseCoverage exists a method to navigate to HomeContract.
If the model defines both a forward and a backward relationship, both directions are taken into account. This means that if setHomeBaseCoverage(HomeBaseCoverage cov) is called on a contract instance of HomeContract, cov.getHomeContract() will return that contract again. This will be clear if you take a look at the implementation of the setHomeBaseCoverage() method within the HomeContract class:
public void setHomeBaseCoverage(IHomeBaseCoverage newObject) {
    if (homeBaseCoverage != null) {
        homeBaseCoverage.setHomeContractInternal(null);
    }
    if (newObject != null) {
        homeBaseCoverage.setHomeContractInternal(this);
    }
    homeBaseCoverage = newObject;
}
Inside the coverage, the contract will be set up as the contract to which the coverage belongs (second if-statement of the method).