
Part 3: Testing with Faktor-IPS
Creating a Test Case
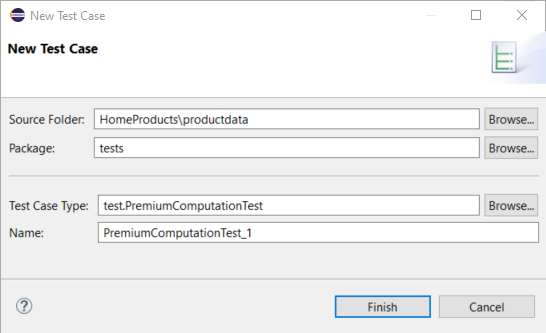
In the project "HomeProducts" we add a new IPS Package named tests under the productdata directory. This package will be used to hold our test cases. To do this, we return to the Model Explorer, select the productdata directory and choose New ► IPS Package from the context menu. Using New ► Testcase (once again in the context menu), we create a new test case. In the wizard we select the previously created test case type named test.PremiumComputationTest and give the the test case a name.
Figure 1. Creating a new test case
After clicking Finish the Test Case Editor will open, displaying the structure of the test case on the left. This structure corresponds to the one we have defined in the test case type. On the right, you can see the test data. For each attribute defined in the test case type, an input field is provided, with the input values on a white background and the expected values highlighted in yellow.
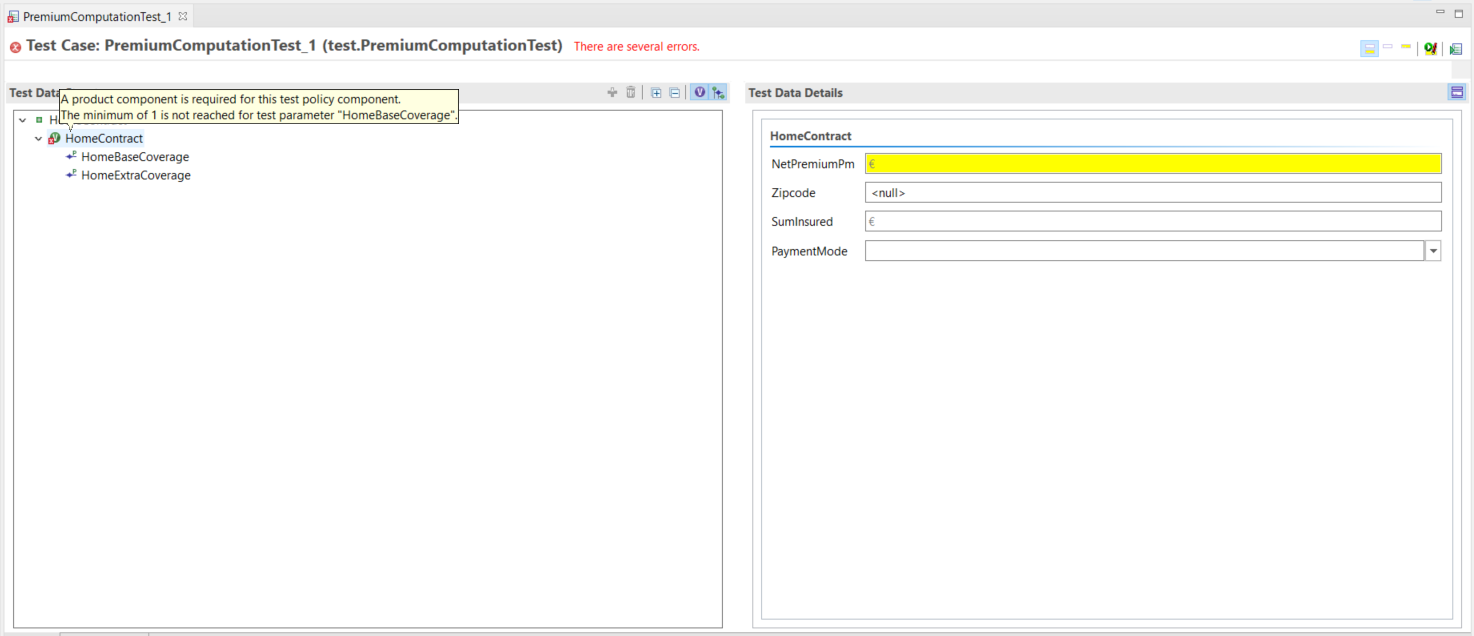
Figure 2. The Test Case Editor hinting at a lacking product component
First we have to assign a product to the HomeContract. This is done by selecting the HomeContract, opening the context menu and selecting Assign Product Component. For our example, we assign the product component HC-Compact 2021-12 to the HomeContract.
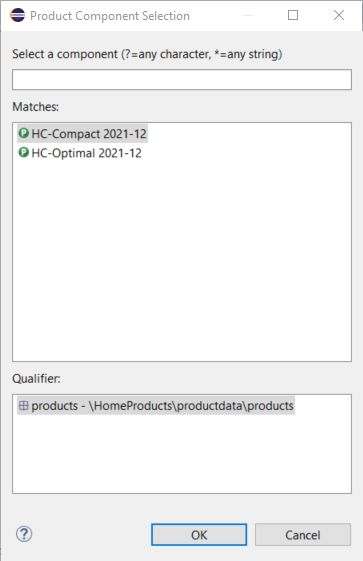
Figure 3. Selecting a product component using "Product Component"
We then use the Add option to add further objects, including a BaseCoverage-Compact 2021-12 for HomeBaseCoverage and two instances of HomeExtraCoverage, one with BicycleTheft 2021-12 and one with OvervoltageDamage 2021-12. Finally we complete the test case according to the following table:
| Parameter | Value |
|---|---|
Product |
HC-Compact 2021-12 |
Base Coverage Type |
BaseCoverage-Compact 2021-12 |
Extra Coverage Types |
Bicycle Theft 2021-12 |
PaymentMode |
1 (annually) |
ZipCode |
81673 (RatingDistrict I) |
SumInsured |
60.000 EUR |
Net Premium according to Payment Mode |
196,00 EUR |
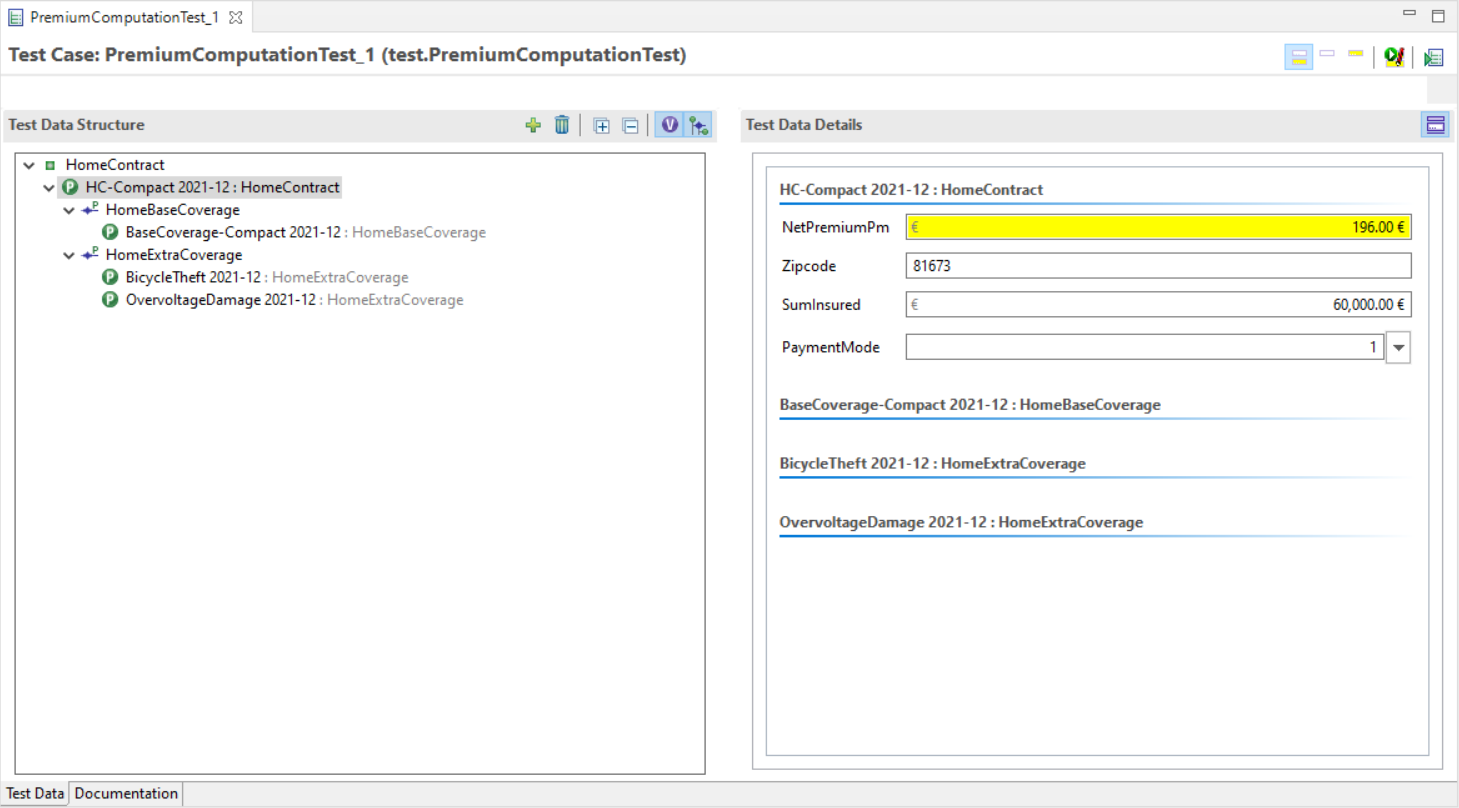
Figure 4. Test Case Editor after all the data has been entered
We now start to execute our test case by clicking the icon Run Test( ) in the upper right corner of the test case editor. (There are two ways to start a test case, we simply use Run test. The other variant, Run test and store differences, will be shown later in the chapter "Creating Test Cases by Copying them").

Figure 5. The test case execution with the Testrunner fails
Faktor-IPS tells us that the test has failed by displaying red bars in the editor’s title section and inside the Testrunner. We look up the Failure Details to see the reason for this failure and we realize that we still have to implement the assert-statements in the test case type. (In place of the asserts, a runtime exception is generated, whose message show
public class PremiumComputationTest extends IpsTestCase2 {
    //...

    /**
     * Executes the business logic under test.
     *
     * @restrainedmodifiable
     */
    @Override
    @IpsGenerated
    public void executeBusinessLogic() {
        // begin-user-code
        inputHomeContract.computePremium();
        // end-user-code
    }

    /**
     * Executes the asserts that compare actual with expected result.
     *
     * @restrainedmodifiable
     */
    @Override
    @IpsGenerated
    public void executeAsserts(IpsTestResult result) {
        // begin-user-code
        assertEquals(expectedHomeContract.getNetPremiumPm(),
                inputHomeContract.getNetPremiumPm(),
                result);
        // end-user-code
    }
}
Inside the executeBusinessLogic() method we call the business logic to be tested:
To do this, we first call the computePremium() method on the input instance. Faktor-IPS ensures that the instance is provided with the current test case’s input value at runtime. We implement the checks in the executeAsserts(…) method. In our case we want to check if the expected net premium is equal to the computed net premium. To do this, we use the assert* methods of the IpsTestCase2 class.
Now we will run our test case again. The green bars inside both the Test Case Editor and the TestRunner show us that the expected result and the computed result are the same.
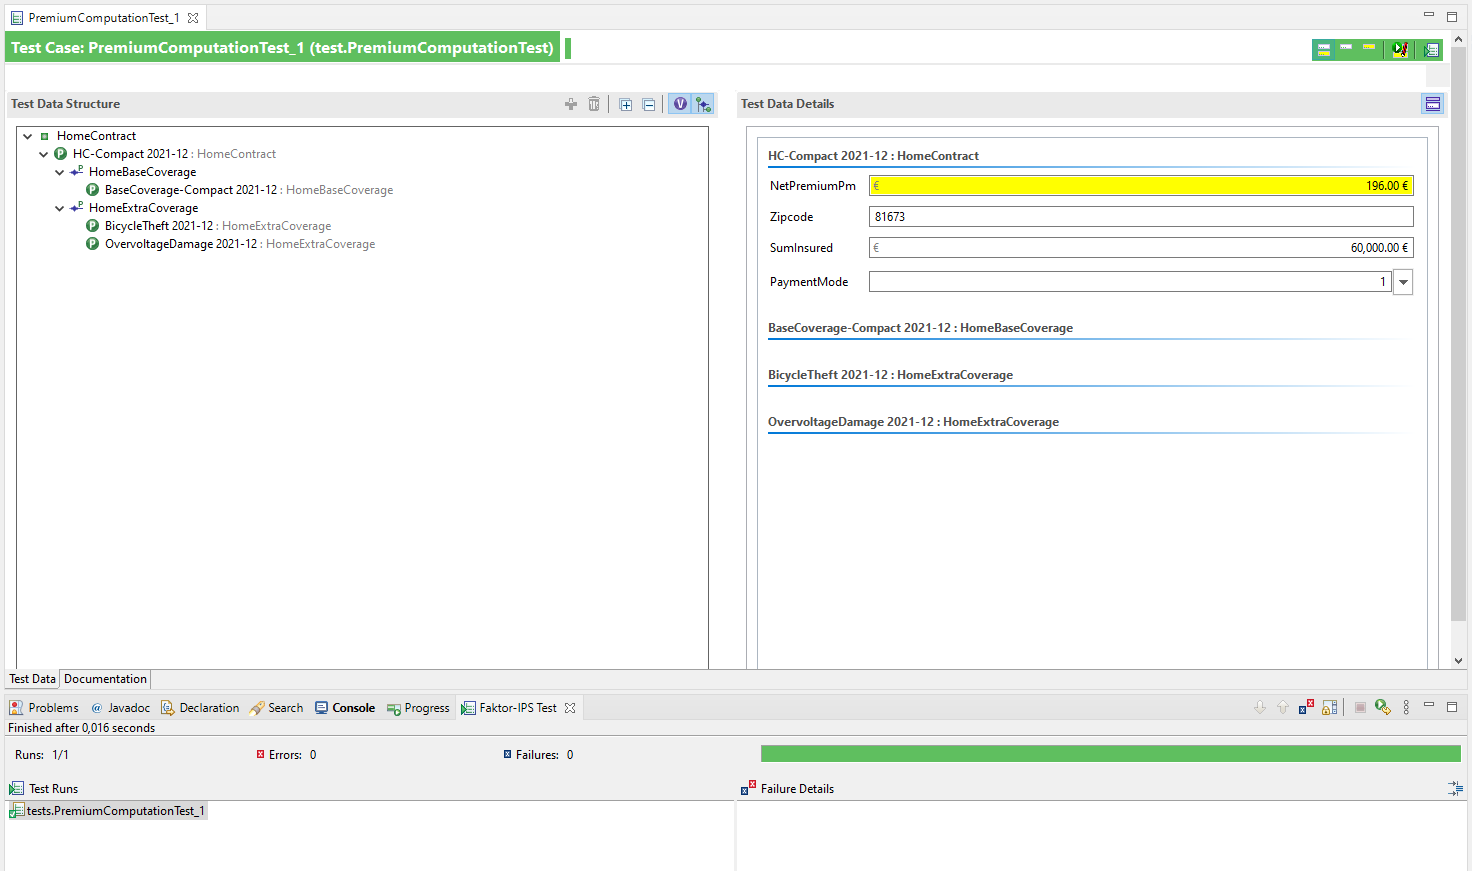
Figure 6. A successful test
Let’s make a cross check by changing the expected result to 200€. The test case fails. In the Failure Details you can see that the computed value of 196€ is not the same as the expected value.
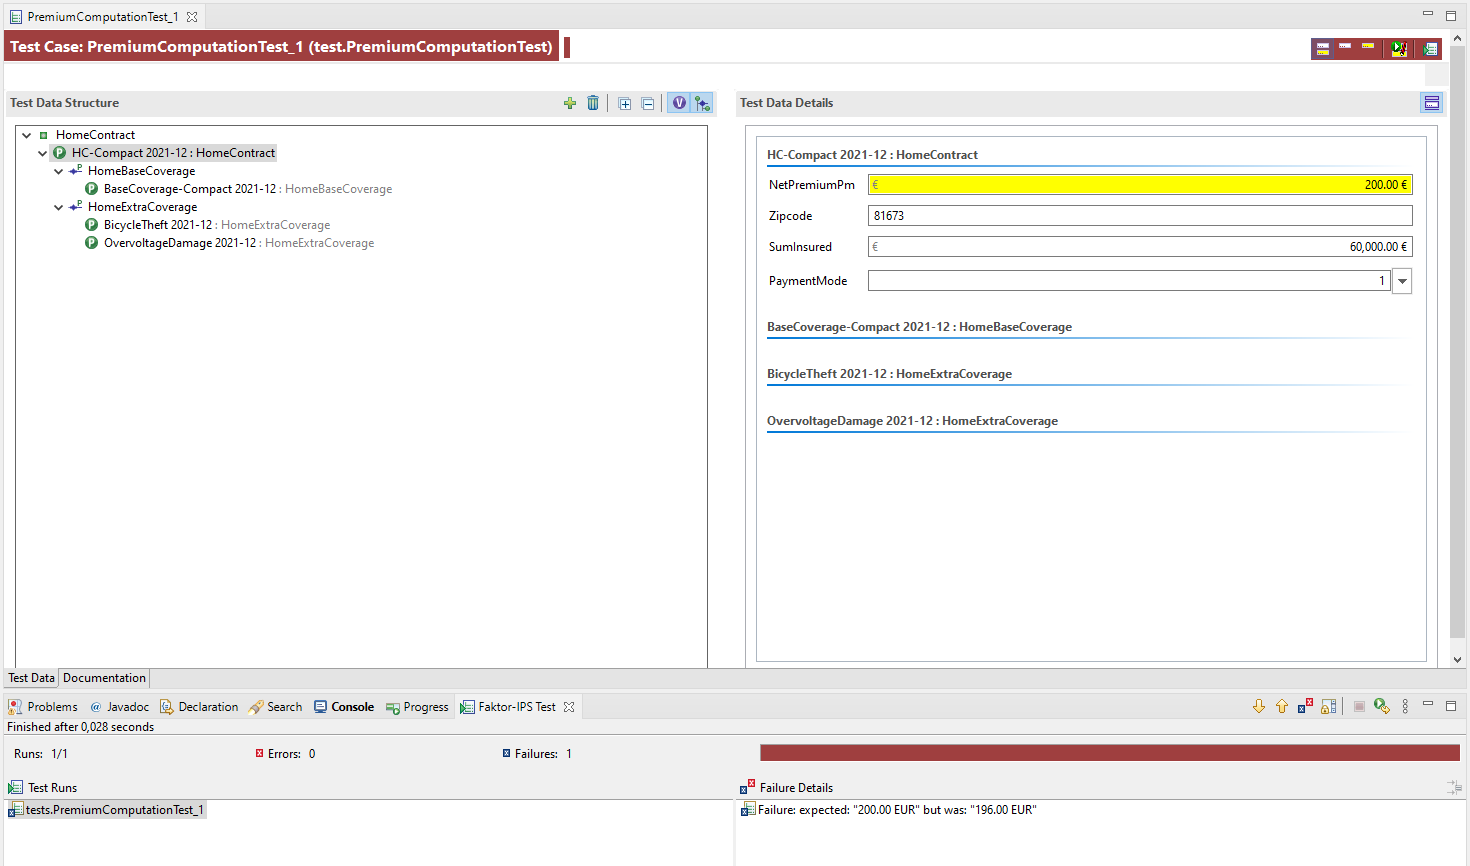
Figure 7. The test case fails
Unfortunately, the error message doesn’t yet tell us which attribute it is referring to. In this case, its not a problem as we have got only one expected value, but there can be be cases where you want to compare multiple attributes in one test case – for example, the individual premiums per coverage and the total premium. To get more detailed information about the failure, you can pass the assert* statements a reference to the attribute. So we pass two additional parameters; the first one is a string that identifies the test object and the second one is the name of the incorrect attribute. If there are multiple instances of an object in the test, they have to be suffixed by a hash (#) sign followed by an index of the instance, where the index numbers start by 0, as in ExtraCoverage#0 for the first instance of the ExtraCoverage object. The implementation for the netPremiumPm attribute in our example will then look as follows:
/**
 * Executes the asserts that compare actual with expected result.
 *
 * @restrainedmodifiable
 */
@Override
@IpsGenerated
public void executeAsserts(IpsTestResult result) {
    // begin-user-code
    assertEquals(expectedHomeContract.getNetPremiumPm(),
            inputHomeContract.getNetPremiumPm(),
            result,
            "HomeContract#0",
            HomeContract.PROPERTY_NETPREMIUMPM);
    // end-user-code
}
If we execute the test case again, (still with the "wrong" expected result), the respective attribute will also be highlighted in red on the user interface and a message in the Failure Details will tell us exactly which attribute it is referring to:
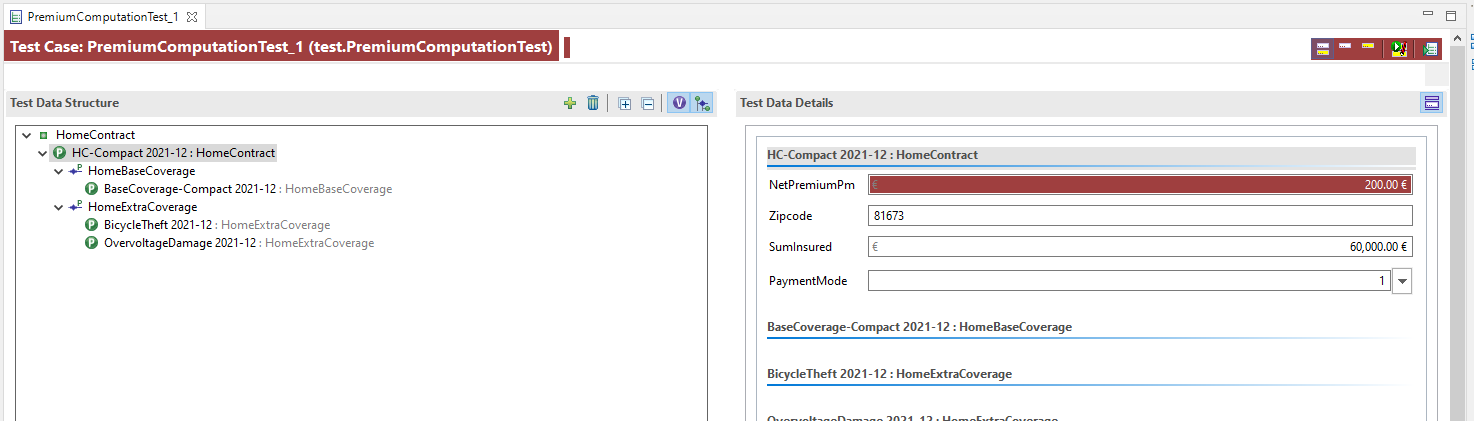
Figure 8. The attribute that caused the error is highlighted in the Test Editor
So now we have completely implemented a test case type and created and run a test case.