
Part 3: Testing with Faktor-IPS
A Test Case Type for the Premium Computation
First we extend the package structure below the source folder named "model" within the project "HomeModel" by adding an IPS package named "test".
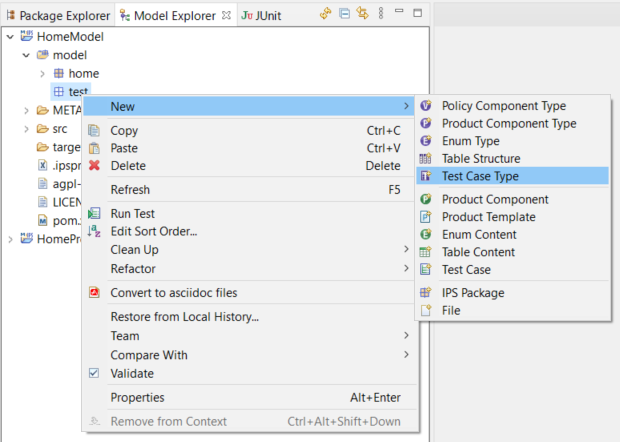
Using the context menu option New ► Test Case Type, we create a new test case type in the Model Explorer (alternatively, this can also be done by clicking  in the toolbar):
Figure 1. Creating a new test case type
Once we have defined the test case type name PremiumComputationTest in the ensuing dialog, the Test Case Type Editor will open. On the left, you can see the (still empty) structure of the test, and on the right the details of each structural element. Now we can start building the structure of our test case type. Test case types are represented in a tree structure, so we first have to define the root element. To do this, we click New… to open the wizard for creating test parameters. Our first task is to select which kind of test parameter we want to create. There are three possible kinds of parameters (we don’t yet take into consideration if they are to be used as input or expected results):
-
Policy Component Type
-
Value
A single value -
Validation Rule
A validation rule to be tested
We choose Policy Component Type and click Next.
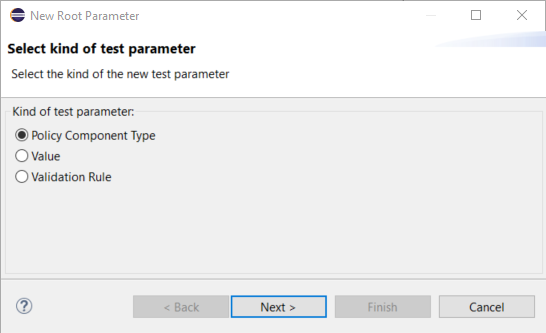
Figure 2. Creating a new root element in the Test Case Editor
On the second page, we select HomeContract as data type. By default the parameter has the same name as the data type, which is just right for our example. In the Type field we can specify the parameter’s purpose in the test case:
-
Input
Attributes of the policy component type are only used as input data for test cases -
Expected Result
Attributes of the policy component type are only used as expected result of the test cases -
Input and Expected Result
Attributes of the policy component type can either be used as input parameters or as expected results
For our example we will choose the parameter type Input and Expected Result because we want to define both the input parameters and the expected result (in our case the computed premium) on the home contracts we will create:
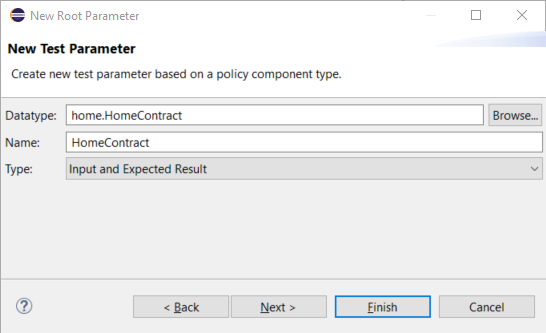
Figure 3. Defining the data type of the test parameter
On the next page of the wizard, you can restrict the parameter cardinality (except for the root parameters, for there can only be one at a time). In addition, you can specify if the policy component must be configured by a product component when defining a test case. By selecting the Requires Product Component checkbox we ensure that for each home contract, the respective home product has to be specified when setting up a test case:
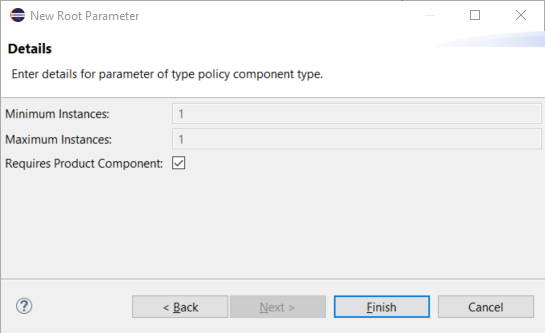
Figure 4. Setting cardinality and product dependency
The cardinality setting and the tag that says if a product component will be required or not, can of course be changed later on directly in the editor.
The next step is to specify which attributes have to be tested and which ones are to be used as input parameters. To do this, we choose the structure view (left), select HomeContract and click Add… on the right-hand pane.

Figure 5. Creating a test attribute
In the ensuing dialog, you can select attributes of the type HomeContract and add them to the test case type. In this case, we capture the parameters netPremiumPm, sumInsured, zipCode, and paymentMode. Then, the editor’s Details page will display the attributes and their types, the derived attribute netPremiumPm will automatically be predefined with the Expected Result type, while the remaining attributes will serve as our input parameters.

Figure 6. The Test Case Type Editor displaying the Home Contract’s attributes being used in the test
Next, we expand the structure of our test case type by adding all other necessary elements to it. In our case, we add the types HomeBaseCoverage and HomeExtraCoverage. To do this, we select the HomeContract element in the structure and create the relationships HomeBaseCoverage and HomeExtraCoverages using the New… button. We select the Input type for our HomeBaseCoverage, set a cardinality of 1..1 and select the Requires Product Component checkbox.
For the HomeExtraCoverages we choose the Input type and a cardinality of 0..*, while selecting the Requires Product Component checkbox as before. Remember that selecting the checkbox means that the respective policy component has to be configured by a product component in the test case. We’ll see this later on, when we are going to create a test case.
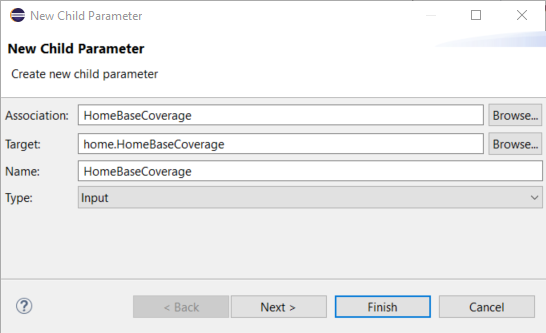
Figure 7. Defining HomeBaseCoverage as a child parameter of HomeContract.
The Test Case Type Editor should now look as follows:
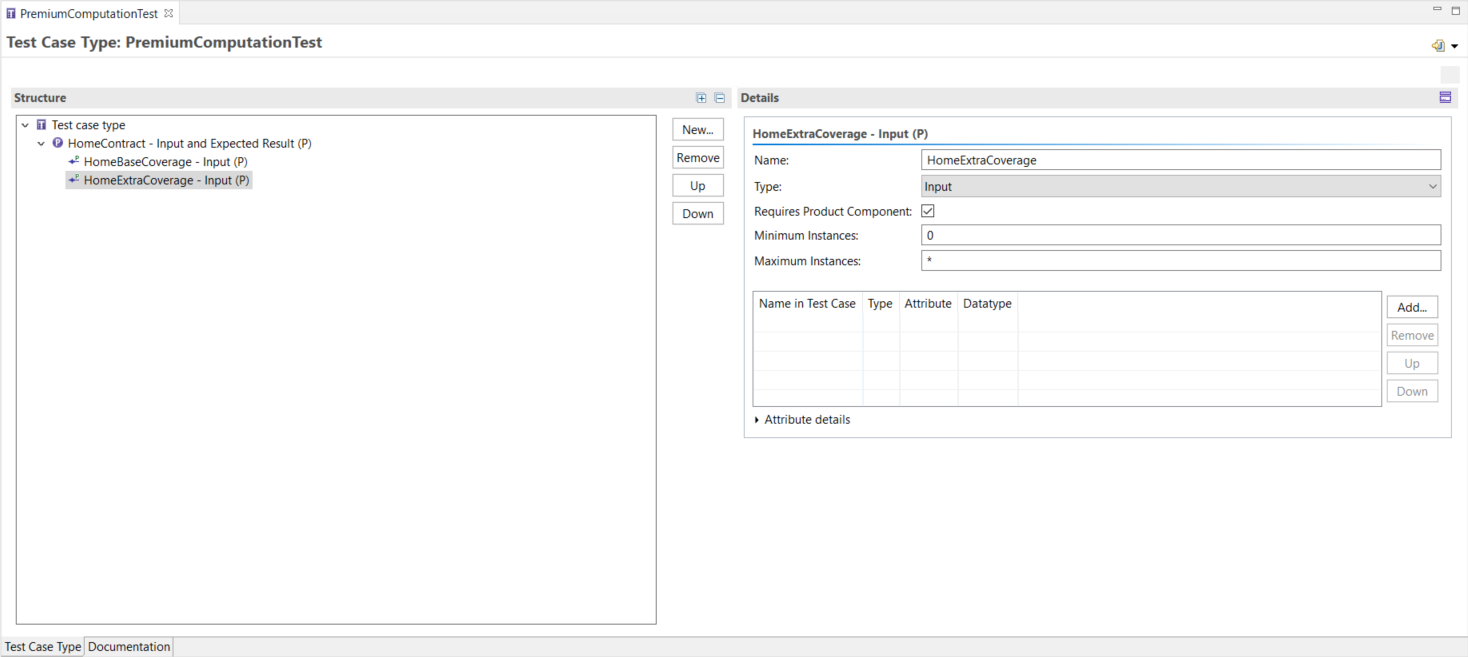
Figure 8. Test Case Type Editor showing the PremiumComputationTest
This way, we have defined that our test case type is appropriate for testing an instance of a home contract, including a base coverage and any number of extra coverages. Each Policy Component must relate to a specific product component.
When storing the test case type, a corresponding Java class will be created within the source directory of the package org.faktorips.tutorial.model.test. This Java class will have the same name as the test case type and it will be used to implement the test logic. Let’s now go to the Package Explorer and have a closer look at the structure of this generated class:
public class PremiumComputationTest extends IpsTestCase2 {
    //...
    private HomeContract inputHomeContract;

    private HomeContract expectedHomeContract;

    public void executeBusinessLogic() {
        //...
    }

    public void executeAsserts(IpsTestResult result) {
        // begin-user-code
        // TODO : Inserts the asserts to execute.
            throw new RuntimeException("No asserts implemented in the Java class that represents the test case type.");
        // end-user-code
    }
}-
Member variables
inputHomeContractandexpectedHomeContractof type HomeContract:
These correspond to the root parameter of type HomeContract. As we have declared the root parameter as input and expected result, two appropriate instance variables have been created:inputHomeContractstores the test case’s input values according to the definition that is provided by the test case type.expectedHomeContractcontains the expected results of the test case (again according to the test case type definition). Hence, at test case run time, we get two HomeContract instances that we can match against each other. -
Empty method
executeBusinessLogic():
The business logic we want to test will be called inside this method, for example, by calling a method on the input objects (in this caseinputHomeContract). This method is executed before theexecuteAsserts(…)method gets called. -
Test method
executeAsserts():
This method implements the comparison of actual and expected values. Initially it contains a generated default implementation that will make the test fail, so the developer is forced to substitute his/her own implementation.
Before providing a final implementation of our PremiumComputationTest class, we create a test case based on our test case type.